Showing posts with label Cooking. Show all posts

Friday, August 3, 2012

Fire Escape Jam


My husband and I moved into Sunnyside a few years ago in the fall. Come spring time we noticed a lot of small, dark berries staining the sidewalks. In fact, the berries were growing from a tree in our backyard. My husband said his grandparents had an identical tree that he and his brother's ate from. I responded by saying, "DON'T EAT THESE BERRIES! THEY MIGHT BE POISONOUS." Well, turns out they aren't poisonous. They are called Mulberries and they have a sweet, tangy flavor.


The first year I looked for recipes to cook with them. My pastry chef friend, Briar, suggested a clafoutis and jam. I made this clafoutis...which was yummy! Briar also helped me come up with a killer jam combo: Mulberry, Strawberry and Rhubarb. It is so delicious! This is my third year making it and it has even stirred a little following among my friends.

I use all the instructions that come with the pectin. I don't have a food mill, so I leave the seeds and mulberry steams. It is more like a preserve style.


Below is what you will need for a small batch of this jam next year. And some pictures!

Follow the instructions very carefully when you are canning!

And if you've never had rhubarb before- ONLY use the stalks. The roots and leaves are poisonous to eat.

This jam is delicious and makes a great homemade gift!

Fire Escape Jam

Ingredients:

2 cups Strawberries
2 cups Mulberries
2-3 Stalks of Rhubarb (only use the stalks)
1 cup honey
Pectin and calcium water (follow instructions of package. I use Pomona's Universal Pectin)


What you'll need for jam/canning:

Bowls
Masher or spoon to mash fruit
Measuring cup
Measuring spoons
Spoon for stirring
Pot for simmering Jam 

Canning Jars
Large pot for canning (I use my lobster pot)
Tongs
     (they make some for canning)
Rack for bottom of pot 
     (helps not to put jars directly on bottom of pot)

Simmering the fruit 
Boiling the Jars

Fire Escape Jam
Makes a little bit of a mess!

Friday, July 27, 2012

Emeril's Szechuan Spareribs-Shortcuts!


Ummm....you should make these! They are so delicious and will inspire your significant other to post sweet things about you on Facebook. Recipe can be found here. I highly suggest cutting down the five hour cook time to two hours with some shortcuts.


Short Cuts

-Completely make the sauce. Add the honey and sesame oil when you mix it all together.
-When the ribs were finished boiling, I added the sauce and stuck them in the fridge. 
-I let the ribs sit in the fridge while I whipped up some Potato Salad.
-I coated them with a brush before broiling for 5mins. 
I then took them out, added more sauce and broiled for another 5mins. 


Friday, December 2, 2011

Quick and Easy Applesauce

        My father has started a tradition of bringing me seasonal fruit from Randall's Farm and Greenhouse. He usually brings a big box of ripe fruit that my husband and I dig right into. Last summer, Dad brought peaches and we chopped them up together and stuck them in the freezer in a couple giant Ziploc Bags. I eventually made Peach Jam with hints of ginger and mint. It was a riff one of Carrol Luna's recipes.


    This time my Dad brought apples. Macintosh apples to be exact. I was eating two to three apples a day when my husband and I started talking about pies or other ways to preserve these lovelies. I thought about homemade applesauce. As a kid I ate applesauce ALL the time as a snack or lunch side. I've never made it myself, save for that Sunday School class in fourth grade. I remember the huge pot steaming and then getting to eat warm applesauce out of a Dixie cup. In my memory it seemed like a big production. But I did some research and came up with this quick and hopefully healthy applesauce! No sugar or canning required.

Quick and Easy Applesauce

    What you'll need EDIBLE:
3-4 pounds of apples
1 1/2 cups Water
1 Lemon (Juice and Peels)
1 teaspoon Cinnamon
1/4 teaspoon Salt

 What you'll need TOOLS:
Knife
Apple Corer
Vegetable Peeler
Large Pot 
Measuring Cup
Potato Masher
Canning Jars or other Containers 


 1~ Wash, Peel and Core the apples. I didn't completely peel each apple. Isn't the skin where all the nutrients are at??

2~ Peel a Lemon so you get at least 2 long strips of lemon peel.

 3~ Add Apples, lemon peel, water, cinnamon and salt to the pot. Add the Juice from about half a lemon.

4~ Boil the apples for about 20-30 minutes or until soft and broken down. I stirred the pot a few times to gives apples on top a chance to simmer on the bottom of the pot!

Bunny Tip - I'm often rushing a project and I was even rushing this sauce! I started the boiling process before all the apples were cored and thrown in the pot. This created a chunkier sauce and we really like it! The apples boil down to sauce quite quickly and you will really notice the change. You should start to see a lovely pink sauce.

5~ Remove the Lemon peels and Apple skin with tongs if desired.

6~Mash!     (My husband helped out on this step!)

7~ Let cool and store.

We were out of canning jars, so we decided to freeze the sauce in small containers that are individual portion sizes.We did freeze one large container for Hanukkah this year!

Ways to enjoy applesauce~

Hot or Cold
All by Itself
with Ice Cream 
as a Snack
with Pork Chops
in Vegan Brownies
with Latkes

Sunday, January 9, 2011

Apple Blueberry Crumble

Tonight I decided to bake, but I also wanted to attempt something new, so I made my first crumble.

It was so easy and delicious, I knew I had to share it. Whenever I bake apple pies, I just sort of guess with everything, and I did that again tonight, but I'll try to share my creation in terms more accessible for the normal baker.

You'll need:
  • 2 large apples good for baking. I used Granny Smith apples.
  • 2 cups of blueberries
  • 1 frozen pie crust
  • 1 T cinnamon
  • 1 T nutmeg
  • 1/2 cup sugar
  • 1 cup butter (quartered)
  • 1/2 cup brown sugar
  • 1 cup flour

Preheat that oven to 350 degrees. Get 'er good and hot!
Peel the apples and cut them into thin slices. The thinner the better.

Put the apple slices in a large bowl and cover them with the nutmeg, cinnamon, and sugar. Stir them so they are evenly covered.

Add your blueberries (rinsed and drained) to the bowl and stir them in as well. Thinly slice one quarter of the cup of butter and place the slices along the bottom of your pie crust. Pour apple and blueberry mixture into pie crust on top of butter slices.

For the crumble, simply mix the brown sugar, flour and remaining butter together with your hands (yep, it's messy, but fun) until it...well... get crumbly. If it's not getting crumbly, keep adding flour. Then sprinkle it over your fruit in your pie crust until it completely covered.

Bake at 350 degrees for 40 minutes. Allow to cool for 15 minutes or so before eating. I served it with Bird's Custard (weird, British, delicious thing you make in a saucepan out of a powder and some milk), but it would be equally delicious with vanilla ice cream.
Enjoy!
Bea

Monday, January 3, 2011

New Year's Eve Party

I rang in the 2011 by hostessing a soiree at my apartment this year. I want to hostess more often to 1. be more social and giving and 2. have incentives to keep fixing up my home. Anyway, it worked out nicely, because I got inspired to hang/invent some new art and I had a great time with my guests!

I forgot to upload the framed albums I put up as art (Michael's sometimes has amazing frame sales. I got my LP frames for $4 a pop), but I did upload this turtle postcard that I framed. It adds an air of whimsy to the hallway, and it cost nothing to do.
I also framed a card that our neighbors gave us at our housewarming party last June. How cute is that little house??
Anyway, I went into party planning knowing that a 7-layer dip had to happen. I mean, duh! I always do a veggie side and omnivore side in the same large glass lasagna dish, splitting the two sides with a thick layer of aluminum foil. Here are my layers
1. Refried beans
2. Shredded cheddar
3. Tomato and garlic salsa
4. Black beans
5. Guacamole
6. Sour Cream (totally forgot this on NYE0
7. Beef (or corn on the veg side)
Then I do more cheese on top, but cheese is already one of the layers, so I'm not going to use the same ingredient twice and call it 8-layer dip. That's lazy.
Of course, to counter balance that savory goodness, I had to make my grandmother's sugar cookies. No recipe, as it's a secret, but I will let you know that butter and sugar start the whole thing, and there is little in the world I love more than butter and sugar in combination.
Artichoke and romano bruschetta also happened.
As did cocktail weenies in BBQ sauce. No photos of weenies are allowed on this blog.

I snagged this little wooden crate from the recycling room in my office. I want to paint it and toss legs and casters on it so it can serve as a drinks cart, but for the party it was just a drinks crate.
My BFF brought amazing Pick Your Nose Paper Cups for everyone to drink out of. I'm modeling the large shnoz with blonde mustache below.

And of course, Miss Parsley was the belle of the ball!

Happy 2011, everyone!
Banner template from The Sweetest Occasion.

Cheers!
Bea

Saturday, January 1, 2011

That's my jam!


Hi all!

I've finally given out all the jam that I made to give away as Christmas presents. Let me tell you a bit about it now.

I got two large cartons of strawberries, two cartons of blackberries, and two cartons of raspberries (about 8 cups of fruit total) and some lemons (for juice) at the grocery store. I also got a dozen 4 Oz Jelly Jars and a package of pectin.

The pectin package had jelly making instructions, but I used an online tutorial (with some personal modifications) to make my jam.

Here goes.

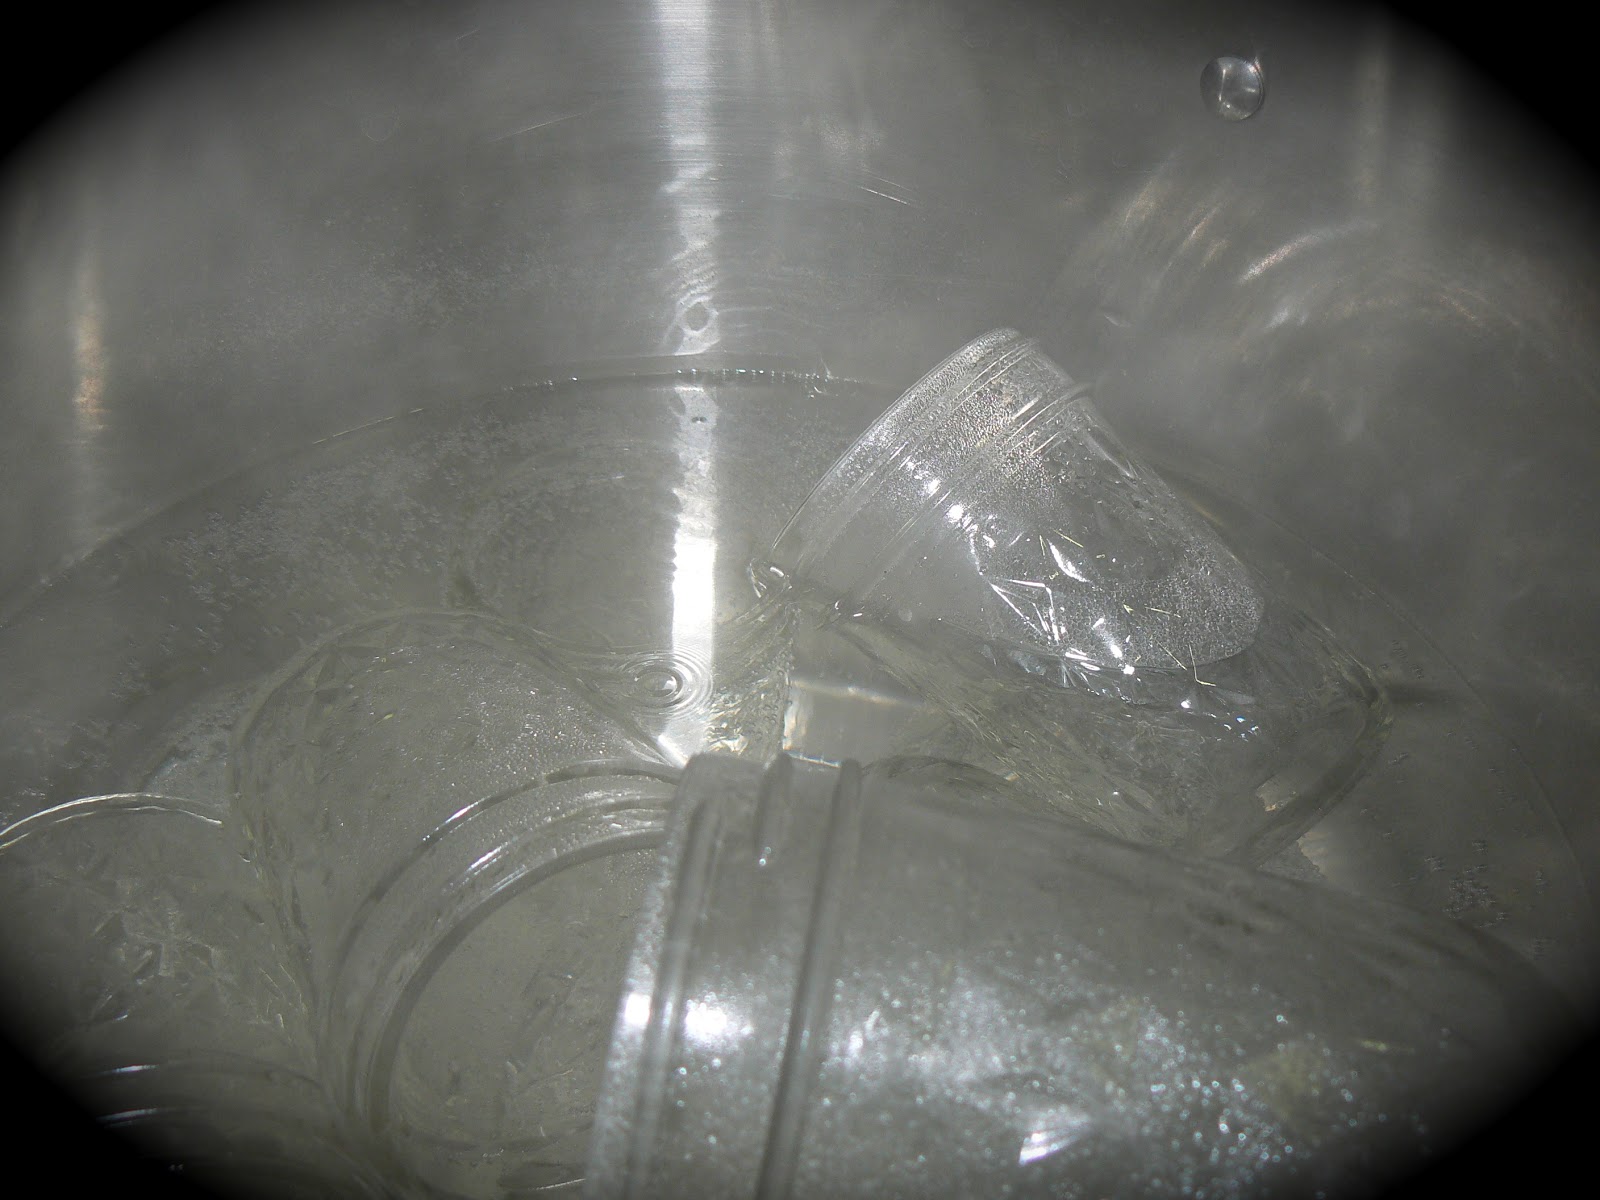
1. Boil your jars for 10 minutes to sterilize them. I did not have a pot big enough for this, so I sealed up my sink, put the jars in, and poured boiling water from a few pots onto them. Then I set the timer. There are pots made specifically for boiling jars, but I don't make jam often enough to merit spending $30 on something like that, so I improvised.

2. While your jars are sterilizing, rinse your fruit, cap your strawberries, and toss them in a food processor or blender. Don't blend the fruit into oblivion. Just get it mashed up.

3. Now pour your mashed up berries into a large pot. I used a ceramic Dutch oven on top of my stove. You want something that heats evenly. I like my Dutch oven, because I know it's less likely to scorch my food.

4. Squirt in some fresh lemon juice to act as a natural preservative. I used about a quarter cup. NOTE: Don't lick the lemon juice off your fingers. I don't know if other people suffer from the horrible urge to lick lemon juice off their fingers, but any time I cook with it, I always wanna put my fingers in my mouth. It's a weird thing from childhood that would have Dr. Freud going bonkers, I'm sure, but just don't do it! The whole reason you boiled everything is because you need everything super sterile for the jam to keep without chemically preservatives.

5. Set your jars out to dry before you turn on the heat on your fruit.

6. Toss your lids (oh, yeah! Those!) in a pan of boiling water. You only need an inch or two of water. Boiling them softens the seals and sterilizes them, too.

7. Bring those berries (or whatever other fruit your using) to a gentle boil and add your pectin. The amount you use depends on how much fruit your using and the brand of pectin you get. That's where the instructions from the package come in handy. My pectin package had me make "calcium water" by mixing a powder pack with some water and then adding the pectin to that. It wasn't hard to do, but not all pectins are like that, so read them instructions.

8. Okay. Boil that stuff and add sugar. You use a lot of sugar to make jam. Like. A lot. My eyes popped about a foot out of my head when I read how much the online tutorial I found wanted me to use. I cut it in half, and I think my jam wound up being very fruity tasting, but not sugary, which is what I wanted. I used 2 cups of sugar with my jam. But I guess you can use up to 4 cups, based on the tutorial I found (PS I would link it, but I can't find it now! It's been a couple months since I made the jam.)

9. Bring this to a rolling boil and stir it CONSTANTLY!!! A rolling boil, I learned recently, is a boil so strong that it doesn't seem to notice that you are stirring like a maniac.

10. After you've boiled for 7 minutes or so, pour your jam into your jars. This was the part I had the hardest time with. I suggest getting a jar funnel. They're about $2 and you can find them at most larger stores (Target, Wal-Mart, etc). I didn't have one, so I was spooning everything into my jars. It took a while. Anyway, fill your jars up and leave about a quarter inch of space at the top. Then slap on those nice sealing lids you boiled (everything is hot when you make jam. Prepare to lose a layer of skin off your palms.), and screw them on tightly.

11. Boil your closed jars for 10 minutes. Yup. I used the sink method again.

12. Set your sealed jars in a dark, cool spot and leave them alone. You'll get to hear bizarre popping sounds as they cool. That's the jar being sucked down and sealing more completely. If you can pop the button on the lid after a couple of hours, it didn't seal. No biggie. Just boil it and cool it again. All my jars sealed within thirty minutes.

There you have it. Very Berry Jam by Bea. Label it however you want and feel like the domestic god/goddess you are!

Monday, December 6, 2010

Happy Chanukah!


Happy Happy Chanukah from Mulder + Scully!!!!
And Bea and Bunny too!!!!

Let's eat latkes! This year was my second time making them... and it went much better than the first! This year I just simplified a recipe from a real Jewish grandma and added apples!!

What you'll need:

  • I used 5 small potatoes and 2 granny smith apples
  • 3 small shallots
  • 2 large eggs, lightly beaten
  • 2 tablespoons flouror matzo meal ( I used flour)
  • 1 1/2 teaspoons salt and freshly ground black pepper
  • Vegetable oil for frying

How to:

Chop the potatoes and apple in a food processor. I did them both together in small pieces to aid my food processor. I don't have any cheese cloth... so after everything was grated I transferred the potatoes to a colander lined with paper towels over a bowl. Twist mixture in towels to remove water. Let it drain for 10 mins. If there is white starch settled in the bowl... remove the water and use starch. My method wasn't starchy and they turned out fine!

Start with the starch if you have and then add shallots, eggs, flour, 1-1/2 teaspoons of salt and freshly ground pepper. Add the potatoes and apples. Combine!

Line a baking pan or platter with paper towels. Heat about 1/4 inch of oil in a skillet. This is the hard part coming up... the oil should probably be a certain temperature but with vegetable oil you can tell when there is movement going on in the pan. Make little pancakes in your hand and drop them in! Each side get a few minutes in the oil... keep an eye on them! I had to keep adjusting the stove temperature to cook evenly. Latkes will turn a golden brown when done! I then transfer them to the lined backing pan to remove oil and cool down!

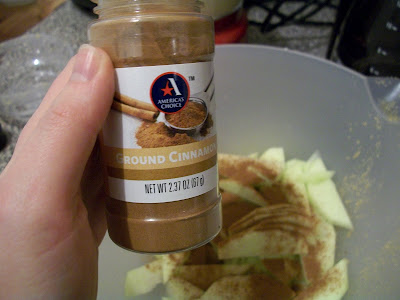
Serve with sour cream or apple sauce... or both.. and enjoy!


Thursday, November 25, 2010

Happy Thanksgiving!


Happy Turkey Day Crafters!!!


I hope you are all having a relaxing holiday with family, friends and delicious food. I, Bunny Hurst, am celebrating my first Thanksgiving with my in-laws to be! I'm super homesick for my mom... so I thought I would contribute a little taste of home to the celebration. I made my mom's green bean casserole, fashioned from the Frenchs' recipe....only I used Trader Joe's French Onions! Sacrilegious?! Maybe... but still delicious!