Showing posts with label Holiday. Show all posts

Friday, December 2, 2011

Quick and Easy Applesauce

        My father has started a tradition of bringing me seasonal fruit from Randall's Farm and Greenhouse. He usually brings a big box of ripe fruit that my husband and I dig right into. Last summer, Dad brought peaches and we chopped them up together and stuck them in the freezer in a couple giant Ziploc Bags. I eventually made Peach Jam with hints of ginger and mint. It was a riff one of Carrol Luna's recipes.


    This time my Dad brought apples. Macintosh apples to be exact. I was eating two to three apples a day when my husband and I started talking about pies or other ways to preserve these lovelies. I thought about homemade applesauce. As a kid I ate applesauce ALL the time as a snack or lunch side. I've never made it myself, save for that Sunday School class in fourth grade. I remember the huge pot steaming and then getting to eat warm applesauce out of a Dixie cup. In my memory it seemed like a big production. But I did some research and came up with this quick and hopefully healthy applesauce! No sugar or canning required.

Quick and Easy Applesauce

    What you'll need EDIBLE:
3-4 pounds of apples
1 1/2 cups Water
1 Lemon (Juice and Peels)
1 teaspoon Cinnamon
1/4 teaspoon Salt

 What you'll need TOOLS:
Knife
Apple Corer
Vegetable Peeler
Large Pot 
Measuring Cup
Potato Masher
Canning Jars or other Containers 


 1~ Wash, Peel and Core the apples. I didn't completely peel each apple. Isn't the skin where all the nutrients are at??

2~ Peel a Lemon so you get at least 2 long strips of lemon peel.

 3~ Add Apples, lemon peel, water, cinnamon and salt to the pot. Add the Juice from about half a lemon.

4~ Boil the apples for about 20-30 minutes or until soft and broken down. I stirred the pot a few times to gives apples on top a chance to simmer on the bottom of the pot!

Bunny Tip - I'm often rushing a project and I was even rushing this sauce! I started the boiling process before all the apples were cored and thrown in the pot. This created a chunkier sauce and we really like it! The apples boil down to sauce quite quickly and you will really notice the change. You should start to see a lovely pink sauce.

5~ Remove the Lemon peels and Apple skin with tongs if desired.

6~Mash!     (My husband helped out on this step!)

7~ Let cool and store.

We were out of canning jars, so we decided to freeze the sauce in small containers that are individual portion sizes.We did freeze one large container for Hanukkah this year!

Ways to enjoy applesauce~

Hot or Cold
All by Itself
with Ice Cream 
as a Snack
with Pork Chops
in Vegan Brownies
with Latkes

Wednesday, November 23, 2011

Ode to Stamps!

Geek Confession: I love Postage Stamps. When I was in fifth grade I started collecting them. My Dad collects stamps too and started me out with a children's stamp collecting book. He taught me the basics about how to soak them to remove the paper envelope. I love stamps so naturally I strike up conversations about them at Pink Olive. I mainly struck up a conversation about these stamps:


 These are the exact stamps I would've LOVED to have used for my wedding! I thought about using Vintage Postage Stamps but didn't know where to get them (Psst-Etsy). Instead I used many current stamps from the Post Office... and they were beautiful.

  I'm stocking up on the Herb stamps above and will probably use them on my holiday postcards (since there isn't a .29 cent holiday stamp).  Here are a few more current stamps I'm loving!

Anytime Stamp

 
Stamps for Save the Dates or Wedding Invitations:


Stamps for Holiday Cards:

All stamps and Images belong to the USPS https://www.usps.com/

PS. USPS....I could use a Holiday Post Card Stamp..for next year...


Martha Stewart Living: Wax Seals


I saw these wax seals in Martha Stewart Living, November 2011.
They used them in gift wrapping but they would also be great
on Wedding Invites, Holiday Cards, etc.
The seal wax is made to go in a glue gun!!! SO EASY!!!


  Image from Martha Stewart Living, November 2011


Tuesday, November 22, 2011

Black Friday Sale


I'm selling vintage goods in my Etsy Shop: Sunnyside Vintage & Craft
And I'm having a sale Black Friday through Cyber Monday.
Code "Gobble" gets you 15% off.
Will be adding more items throughout the weekend!

Monday, February 14, 2011

Paper Heart Ornament


Happy Valentine's Day!


Today, I'm sharing with you this fun craft and our first ever video blog! Below are the instructions to get you ready to craft along with the video. Even if you aren't crafting, you can watch the video and see how I closed me sweater with a clothes pin...


What you will need to make the paper hearts above:

1) Stapler (OR glue and binder clip)
2) Scissors and paper cutter
3) Hole punch
4) Paper * - 12" strips x 2, 10" x 3, 7" x 3
5) string or yarn for hanging

* You can use any kind of paper: maps, comic books, sheet music, construction paper, etc.


Before watching the video you will need to cut out your paper strips. You can see above I used sheet music. Curbly.com has some great directions for making similar ornaments and different sizes. If you get confused, check out their website.

1) Cut two strips that are 12 inches long and 1.5 inches wide.

2) Cut two strips that are 10 inches long and 1.5 inches wide.

3) Cut three strips that are 7 inches long and 1.5 inches wide.


Below are a couple variations

Variation 1-
Omit the extra 7" strip.


Variation 2-
Omit the 7" Strip and do not tuck the strips into the bottom. Instead collect them all at the top and staple. This works well with heavier paper

Wednesday, December 29, 2010

Wreath Interpretaions: A holiday outing

I'm always looking for holiday activities that will keep me out of Times Square and Rockefeller Center. I saw "Wreath Interpretations" listed in Time Out New York and gave my fiance a lunch date on our advent calendar. I wasn't sure what the Arsenal Gallery was and was pleasantly surprised to be lead to a building right before the Central Park Zoo. It is the offices of Park and Recreation with wreaths hung up on the third floor. It isn't shiny and it feels like a hole in the wall type place. But the lobby has amazing murals and the place is charming (esp. if you watch Parks and Recreation).

I've been obsessed with wreaths so this was the perfect thing to see. Some of the wreaths are inspiring and some are just plain strange. It is open until Jan. 6th and it takes 30 minutes MAX to look at the wreaths. Could be a fun and low key New Year's adventure!


Here is one of my favorites!

Checkout the Parks Dept. Website for more info.

Thursday, December 23, 2010

Spoiler Alert: DIY Candles

Spoiler Alert: I'm giving these out to a couple people tomorrow! They aren't involved in the Secret Santa and I'm pretty sure they don't follow Cozy Rustic... so, it is safe to post....


About a year ago, I spied (with my little crafty eyes) tea cup candles in Martha Stewart Living and all over crafting blogs. They are so adorable! I mainly saw them with cups minus a saucer... and really...isn't it usually the tea cup that breaks first??? Anyway, as you may or may not know... I'm kinda crazy about recycling. So this craft seemed amazing to me! Because you could use leftover wax from old candles around the house and you use other things besides tea cups.. let your imagination run wild!


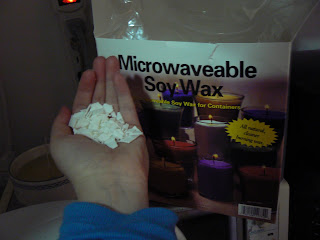
I did some research about the most Eco and easy ways to make candles. Soy Wax was the best way to go. This way there is no paraffin involved and the bees can take a break! The large box of wax was not that cheap... but I think it will make a lot of candles! And there are directions on the box!

What you'll need:

Two vintage bowls with saucers from Fishs Eddy
Wicks
Soy Wax


Bunny's Simplified Directions:

1) Clean bowls and let dry.

2) Fill the bowl with wax. Put in the microwave. Test in 30 Sec increments.

I eliminated pouring the wax into the bowls b/c the bowls were microwave safe. I had to guess about how much wax but I added more when I was off. It melted in my microwave in 1-2 mins.


3) Insert the wick right away.

Normally, you would pour in the wax to a container with the wick already in the container. But this was so easy and there were no air bubbles, wells or holes in the middle of the candle.

4) Let dry. This will take an hour or two.

5) Cut wick to desired length.

I recommend browsing other directions online or the box of wax. The wax should reach a certain temperature but my thermometer broke mid-craft so I didn't pay attention to temp at all. Hopefully... that doesn't make a difference!


Cork Wreath

Bunny here. Remember when Bea made that adorable cork wreath? Well, we both put the word out looking for corks and I got a bunch from Madame Marble... who then sent me an amazing picture of a cork wreath at Curbly. Thus I found Curbly (amazing blog!) and the inspiration to make this wreath! The tutorial on Curbly doesn't direct you to make the wreath they have pictured. So, I googled directions and found some amazing directions from Lolly Chops.


Bunny Tip 1: I highly recommend reading ALL the directions before you start! She has a tip at the end about saving corks with pretty designs for the last layer! And I wish I had done this.. but I made mine as I got corks in batches.


Bunny Tip 2: It does use a lot of glue in the glue gun... so make sure you are stocked up!


I gifted my wreath to Madame Marble for Christmas yesterday! I gave a gold ribbon with the wreath for hanging or decorating. And I can't wait to see where she hangs it in her home! The wreath drew some attention from shoppers in Despana's where we had lunch! And it seems impressive.. like it took a long time to make...but it didn't take long... and it was fun!


This wreath could not have been made without the generous cork donations of Bea, Madame Marble, Bea's bartender friend, AND Scott and Sarah.... I met Scott and Sarah at a party and after hearing about my wreath came back to the party with a bag of corks! Luckily, they lived down the hall! So, thank you!

Monday, December 20, 2010

Paper Wreath! A Monday Share


So, Bea and I are kind of obsessed with crafting blogs lately! And it is nice to see what others are making, up-cycling and crafting. I've been loving the cork wreath that Bea made and had been wanting to make a wreath for myself. And I sure did get inspired to make this wreath!

I first saw this wreath over at Curbly, which led me to the directions by Jeffery Rudell over at Craft Stylish where you can see all the directions. I followed them and made a wreath! My color scheme is very bright and I love it! I think it will work for Christmas and New Years and all winter long. I was tempted to hang it inside my apartment so I can look at while I'm home...but now I have something bright to see when I come home.

A couple tips:

1) I used scrap booking paper and come of it didn't hold up to well to the glue gun. So, heavier paper or painting tiles are good ideas. Though I was able to cover up the areas quite nicely with other circles.

2) I like to keep my crafts as Eco as possible. So, i used a bunch of scraps from my scrap booking paper for the circles. I was reluctant to buy a Styrofoam form... but I caved in and did. I bought a "weathered" green form at Michael's that was sturdier and less expensive than the white. And I plan to reuse it over and over again!


3) It got a little tricky to keep all the circles lined up to be the same length because they start to bend... I would just take breaks and wait for the circles to dry. Then I would bend all the circles so they would be flat! I think thicker paper would help with this too. Mine was thick enough that I could bend it pack into place and crease it so it wouldn't bend again.


Here is the finished product before I hung it on my door with red yarn!


Monday, December 6, 2010

Happy Chanukah!


Happy Happy Chanukah from Mulder + Scully!!!!
And Bea and Bunny too!!!!

Let's eat latkes! This year was my second time making them... and it went much better than the first! This year I just simplified a recipe from a real Jewish grandma and added apples!!

What you'll need:

  • I used 5 small potatoes and 2 granny smith apples
  • 3 small shallots
  • 2 large eggs, lightly beaten
  • 2 tablespoons flouror matzo meal ( I used flour)
  • 1 1/2 teaspoons salt and freshly ground black pepper
  • Vegetable oil for frying

How to:

Chop the potatoes and apple in a food processor. I did them both together in small pieces to aid my food processor. I don't have any cheese cloth... so after everything was grated I transferred the potatoes to a colander lined with paper towels over a bowl. Twist mixture in towels to remove water. Let it drain for 10 mins. If there is white starch settled in the bowl... remove the water and use starch. My method wasn't starchy and they turned out fine!

Start with the starch if you have and then add shallots, eggs, flour, 1-1/2 teaspoons of salt and freshly ground pepper. Add the potatoes and apples. Combine!

Line a baking pan or platter with paper towels. Heat about 1/4 inch of oil in a skillet. This is the hard part coming up... the oil should probably be a certain temperature but with vegetable oil you can tell when there is movement going on in the pan. Make little pancakes in your hand and drop them in! Each side get a few minutes in the oil... keep an eye on them! I had to keep adjusting the stove temperature to cook evenly. Latkes will turn a golden brown when done! I then transfer them to the lined backing pan to remove oil and cool down!

Serve with sour cream or apple sauce... or both.. and enjoy!


DIY Menorah for Chanukah

Happy Happy Chanukah!

As a boy my fiance made this clay menorah for his family. But he wanted to share this DIY Menorah below that he made last year so we could light the candles together each night at home.
We didn't have a menorah and he remembered a craft that one of his brothers made in school. His family loved it and they still use it. So, we decided to recreate an old family tradition .
What you'll need:
a piece of wood (approximately a foot long)
ten nuts from home depot (I measured the nuts with a candle to get the right size)
super glue (glue gun would be fine too!)
Chanukah Candles and Matches/Lighter


1) Evenly space 9 nuts across the piece of wood
2) Glue nuts down to the wood and let dry.
3) The 10th nut is for the “shamash” or service candle, which must be elevated. So, glue that 10th nut on either edge or in the middle.
4) Being a gentile myself, here is a little info on lighting the candles!
Candles are placed in the menorah from right to left. Correspond candles to which night of Chanukah it is. There is an additional candle which is elevated. The shamash is lit first, and then used to light the other candles, from left to right.


Here is a picture from last night (the 5th night) so you can see the set up!

Last night, I celebrated Chanukah with my mother-in-law to be and the family. We had delicious food, lit candles and exchanged gifts! I had to rush off to the Opera after, but it is really nice to get a glimpse of other family traditions!

Thursday, November 25, 2010

Happy Thanksgiving!


Happy Turkey Day Crafters!!!


I hope you are all having a relaxing holiday with family, friends and delicious food. I, Bunny Hurst, am celebrating my first Thanksgiving with my in-laws to be! I'm super homesick for my mom... so I thought I would contribute a little taste of home to the celebration. I made my mom's green bean casserole, fashioned from the Frenchs' recipe....only I used Trader Joe's French Onions! Sacrilegious?! Maybe... but still delicious!