Wednesday, December 29, 2010

Craft Submission- Stefanie Estes

"Cork wine holder? Yes! Cozy Rustic endeavor? Perhaps?" asks Stefanie Estes.


I think perhaps we will have to make this! How cute to set out on your holiday table or just to hold that half open bottle in the kitchen. I'm having some neighborhood friends on New Year's Eve and I'm sure there will be corks leftover....

Tuesday, December 28, 2010

Welcoming in the New Decade

Image from Vintage Culture.

Christmas has been a blizzard of activity as well as just a straight-up blizzard this year. My visiting family has turned into my stranded family, and my home feels crowded and crazy. I think this isn't an abnormal way to feel at the holidays, though. It is easy to become stressed with extra people and extra planning (not to mention extra pets, if they happen to be part of your family package), and one can forget to slow down and count one's blessings. My own frustrations with the blizzard and my crowded apartment lead me to stop and think about how I live my life.

The end of a year is always a time for reflection, so it makes sense that the end of a decade would be doubly so. This year, I would like to create a list of the parts of/moment from my life over the past decade that I am most proud of and the parts/moments I would have lived differently in hindsight. I think analyzing my past will give me a better shot at improving my future (as long as I take in what I need to and process it all without dwelling on anything - good or bad).

As I review my year, I also like to make my New Year's Resolutions. Though, the word "resolutions" has always bothered me, as it seems like I've just "resolved" to do these things, when really, I have usually been working on them for ages. It's not New Year's Resolutions so much as a restating of my goals. Anyway, here they are, and I've also included some tips and tools from other blogs I love.

1. Become an organized person: Always have goals and action plans to help reach said goals. Know where information you need is. Don't let your home become disorienting or muddled.
Suggested reading/tools: Sara Cottner of Feeding the Soil and 2000DollarWedding has the most amazing organization binder I've ever come across. And she was kind enough to put her downloadable templates online!
I also am loving Simplify 101 which sends email tips and has online organization courses. Give it a looksee.

2. Create daily: Continue writing and finding joy in writing. Collaborate often. Don't hesitate and second guess your creativity. Blog. Create things you can and will use. Make all the time, whether it's poetry, music, movement, food, or decor. Always make something.
Suggested reading/tools: Julia Cameron, the author of The Artist's Way, also wrote a book called The Right to Write: An Invitation and Initiation into the Writing Life, which teaches one to turn off all the voices that say why we can't write and to pick up a pen and go at it. I love this book and recommend it constantly. You will write if you read it.

3. Be fiscally wise: Control spending. Manage your budget wisely. Build up a safety net. Pay down student loan and credit card debt whenever possible.
Suggested reading/tools: I've been using Mint to budget, though it is a little frustrating when I transfer funds from one account (checking) to another (savings), but it emails me a weekly report and keeps information in one place.

4. Love: Show the people you love how much they mean to you. Don't forget to tell people even if you think they already know you care about them. Be kind to strangers, animals, people you love, and even people you don't really care for.
Suggested reading/tools: Volunteer Match can show you tons of ways to help others, and you probably know lots of ways already.

That's it for my upcoming year and decade really. These are broad goals, yes, but I think the simpler ones are the steps within these, and they will certainly make appearances here on the Cozy Rustic blog.

Happy New Year, everyone!

-Bea

Monday, December 27, 2010

What's for Dinner? A Monday Blog Share

I think this would be a really yummy dish to try at dinner tonight! A warm and delicious antidote to this cold, snowy day. It may not be the best post-holiday detox meal, but it would be a lovely New Year's treat. We've made this twice in the Bunny Household and it feels a special occasion when we take it out of the oven!


It is a very simple dish consisting of mushrooms, butter, garlic, oil (we used olive oil), parsley and lemon juice. And make sure you have some crusty bread to dip!!!!!!!!!!!!!!!!!!!!!!!!!!!!!!!!!

I got the "Garlic Butter Roasted Mushroom" recipe from Smitten Kitchen, my favorite cooking blog! A friend turned me on to it over a year ago and I've tried countless recipes. I have a few more go to dishes that are from the blog. Smitten Kitchen will surely inspire you...and the photos are amazing!

Bon Appetit!
Bunny

* I'm going to try to cook this next time sans butter for my vegan friends and my lactose intolerant self. Will update on the comments section. Please comment with any suggestions you might have! More Oil/lemon?

Sunday, December 26, 2010

Merry After Christmas Snow Storm!


Merry Day After Christmas! Luckily, I made it back home despite the snow storm. I hope you all had a very Merry Christmas, ate yummy food and got to spend time with family. I hope that you are finding time to relax and enjoy the relief of post holidays!


Wanted to share a few photos and wish you all a Merry Christmas! New Years is coming and I'm sure we will be posting craft ideas and resolutions for 2011.


I was so taken with Bea's Advent Calender that I crafted one up for my dear fiance. I used envelopes, the front part of old Christmas cards, decorated index cards and a couple punched out circles. It brought us some much needed time together during the holiday hustle.


And finally our 2010 Christmas cards! My mother tapes them up in a doorway every year and in college I started the tradition of taping them up to my front door. Though I've been thinking about maybe using them on the tree or making them into a wreath...


Hope your Holiday was Merry and Bright!
Love Bunny

Thursday, December 23, 2010

Spoiler Alert: DIY Candles

Spoiler Alert: I'm giving these out to a couple people tomorrow! They aren't involved in the Secret Santa and I'm pretty sure they don't follow Cozy Rustic... so, it is safe to post....


About a year ago, I spied (with my little crafty eyes) tea cup candles in Martha Stewart Living and all over crafting blogs. They are so adorable! I mainly saw them with cups minus a saucer... and really...isn't it usually the tea cup that breaks first??? Anyway, as you may or may not know... I'm kinda crazy about recycling. So this craft seemed amazing to me! Because you could use leftover wax from old candles around the house and you use other things besides tea cups.. let your imagination run wild!


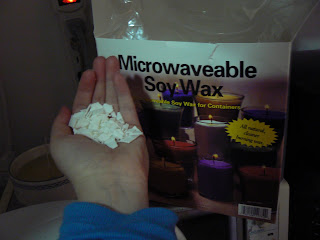
I did some research about the most Eco and easy ways to make candles. Soy Wax was the best way to go. This way there is no paraffin involved and the bees can take a break! The large box of wax was not that cheap... but I think it will make a lot of candles! And there are directions on the box!

What you'll need:

Two vintage bowls with saucers from Fishs Eddy
Wicks
Soy Wax


Bunny's Simplified Directions:

1) Clean bowls and let dry.

2) Fill the bowl with wax. Put in the microwave. Test in 30 Sec increments.

I eliminated pouring the wax into the bowls b/c the bowls were microwave safe. I had to guess about how much wax but I added more when I was off. It melted in my microwave in 1-2 mins.


3) Insert the wick right away.

Normally, you would pour in the wax to a container with the wick already in the container. But this was so easy and there were no air bubbles, wells or holes in the middle of the candle.

4) Let dry. This will take an hour or two.

5) Cut wick to desired length.

I recommend browsing other directions online or the box of wax. The wax should reach a certain temperature but my thermometer broke mid-craft so I didn't pay attention to temp at all. Hopefully... that doesn't make a difference!


Cork Wreath

Bunny here. Remember when Bea made that adorable cork wreath? Well, we both put the word out looking for corks and I got a bunch from Madame Marble... who then sent me an amazing picture of a cork wreath at Curbly. Thus I found Curbly (amazing blog!) and the inspiration to make this wreath! The tutorial on Curbly doesn't direct you to make the wreath they have pictured. So, I googled directions and found some amazing directions from Lolly Chops.


Bunny Tip 1: I highly recommend reading ALL the directions before you start! She has a tip at the end about saving corks with pretty designs for the last layer! And I wish I had done this.. but I made mine as I got corks in batches.


Bunny Tip 2: It does use a lot of glue in the glue gun... so make sure you are stocked up!


I gifted my wreath to Madame Marble for Christmas yesterday! I gave a gold ribbon with the wreath for hanging or decorating. And I can't wait to see where she hangs it in her home! The wreath drew some attention from shoppers in Despana's where we had lunch! And it seems impressive.. like it took a long time to make...but it didn't take long... and it was fun!


This wreath could not have been made without the generous cork donations of Bea, Madame Marble, Bea's bartender friend, AND Scott and Sarah.... I met Scott and Sarah at a party and after hearing about my wreath came back to the party with a bag of corks! Luckily, they lived down the hall! So, thank you!

Monday, December 20, 2010

Paper Wreath! A Monday Share


So, Bea and I are kind of obsessed with crafting blogs lately! And it is nice to see what others are making, up-cycling and crafting. I've been loving the cork wreath that Bea made and had been wanting to make a wreath for myself. And I sure did get inspired to make this wreath!

I first saw this wreath over at Curbly, which led me to the directions by Jeffery Rudell over at Craft Stylish where you can see all the directions. I followed them and made a wreath! My color scheme is very bright and I love it! I think it will work for Christmas and New Years and all winter long. I was tempted to hang it inside my apartment so I can look at while I'm home...but now I have something bright to see when I come home.

A couple tips:

1) I used scrap booking paper and come of it didn't hold up to well to the glue gun. So, heavier paper or painting tiles are good ideas. Though I was able to cover up the areas quite nicely with other circles.

2) I like to keep my crafts as Eco as possible. So, i used a bunch of scraps from my scrap booking paper for the circles. I was reluctant to buy a Styrofoam form... but I caved in and did. I bought a "weathered" green form at Michael's that was sturdier and less expensive than the white. And I plan to reuse it over and over again!


3) It got a little tricky to keep all the circles lined up to be the same length because they start to bend... I would just take breaks and wait for the circles to dry. Then I would bend all the circles so they would be flat! I think thicker paper would help with this too. Mine was thick enough that I could bend it pack into place and crease it so it wouldn't bend again.


Here is the finished product before I hung it on my door with red yarn!


Weekend Fun.


As I mentioned in Sunday's post. I got a tad bit carried away this weekend with projects. Here are a few photos of my crafty fun. I'll put up a delicious gingerbread recipe later this week and add a photo of the stockings hung with care once their loops have been added and they are up and ready for Santa. And speaking of Santa, somebody met him this weekend!!


Sunday, December 19, 2010

Carried away

I got just a teensy bit crazy today with making things. Yesterday I got the futon that's on my big to do list here and some pillows and a throw which should have been on the list, but weren't. Anyway, they are both lovely and cozy and set up in my guest room/office/dog nursery (the dog nursery part is a joke, but don't tell Parsley that). The new furnishings really help the room feel welcoming, but the walls are still pretty barren. So, I got three cheap frames and an old wildflower field guide. Color pages were ripped from the book (please color photocopy; ripping a book feels like such a sin) and tossed into frames. It was something, but not quite enough.

So I made this.

How? I took a photo of Parsley that I snapped in the dog park yesterday.

Cropped it to highlight her pretty doggy head.

Turned it black and white, upped the contrast and balance to the extreme.

Printed it, cut it out, and filled in any leftover white bits with black Sharpie (my favorite crafty tool). Then I simply slapped the cut-out onto a plain old piece of printer paper and put it in an 8 1/2 x 11 frame.

Viola!

Easy as pie! Speaking of pie, I also baked tonight, prowled Craigslist for dining chairs, found said chairs exactly one block from my apartment, bought and lugged the chairs home, and finally cut up the feller's old t-shirt and made his Christmas stocking.

I know. It's a lot. I'm just as impressed as [I sincerely hope] you are. But if you'll excuse me, I have a dog to walk.

-Bea

Wednesday, December 15, 2010

Big Plans

Hi all!

This post will have no photos. Boring, I know.

I just want to gather my thoughts on what to do with my apartment. I live in NYC in a place I'm afraid to paint, but I'm ready for it to start feeling like a cozy home instead of a rented transitory dwelling. A dog certainly helps the space feel like a home, but it's time to work on decor.

I'll put up some before pics so you can see what I'm working with. It's not that the apartment isn't nice, it's just a little junior feeling. It could stand to be gussied up a bit.

Here are some ideas I have. Each one will be documented on this blog as it occurs.
1. Rug under the dining table
2. Shelves over dining table
3. Shelves in kitchen
4. Butcher cart in kitchen
5. Futon in guest room/office/game room
6. Rug in guest room/office/game room
7. Hanging light over dining table
8. Side table in guest room/office/game room
9. more plants and flowers everywhere
10. Frame pages from animal books
11. Frame monogram art
12. Frame posters for shows the feller and i have written
13. Headboard
14. Initials framed over bed
15. wall lamps at bed
16. Empty wine bottles as decoration
17. More candles
18. Replace oil in reed diffuser
19. Line dresser drawers
20. Cheap lamps, spray painted
21. See above, but with candle sticks
22. vase of postcards
23. Nightstand/shelf for the feller?
24. storage boxes/baskets for shoes, scarves, gloves, etc in closets
25. Wrapping paper inside glass on medicine cabinet
26. Line inside of medicine cabinet
27. Cover bare ceiling bulbs somehow
28. File cabinet/boxes for office
29. Reupholster desk chair
30. New drawer pulls and door knobs all over the place
31. cereal boxes into magazine storage
32. spray paint empty cans to be pencil holders, etc
33. keep a plate under the oil and vinegar
34. Glass soda bottle bud vases (3) in the kitchen window
35. Subway art to reflect where we've lived
36. Mirrors
37. Fancy sparkling water bottles grouped to catch the light
38. paper shredder (not really a decoration, but practical with clutter management)
39. get a safe
40. corkboard inside cabinets for shopping lists, coupons, etc.
41. hooks and shelves on insides of cabinet and closet doors

That's all I can think of for now. It's a pretty big list, but I think each item will help transform my apartment into a home.

I'll keep you posted on my progress!
-Bea